Life Cycle Calculator: Getting Started!
Why the Life Cycle Calculator? TransAct, eSPACE and Cool Solutions Group are huge proponents of Capital Reserve Planning...Life Cycle Initiatives...Facility Stewardship. We believe every user should have this tool and should have a plan for the inevitablity of future costs related to facilities and capital replacement costs. That is why this tool is offered for FREE!
Life Cycle Calculator
- Getting Started – The Life Cycle Calculator is a fantastic tool to help you and your organization:
- Track all physical assets
- Set Current Replacement Values (CRV)
- Project inflation impacts
- Set budget amounts on an annual basis for all items and assets
- See a dashboard of dollars needed each year
- Set reminders and alerts for key milestone dates related to the replacement of these items
- Track depreciable assets and track the annual depreciation of the same
- Interface with the Facility Tracker Work Order Management application to further increase efficiency and effectiveness
The below article and tips will help you get started with being proactive and intentional with your Life Cycle and Capital Reserve Planning.
2. INITIAL SETUP
- USERS: To add new users, go to Setup, click on USERS on the left sidebar,
click the ADD NEW USER button as shown below, complete the form and click SAVE on the bottom right corner.
You can add ADMINS and USERS. ADMINS will have full access, while USERS will not have access to the SETUP section.
NOTE: You can make a person an ADMIN in the Life Cycle Calculator without them being an ADMIN in the other Facility Tracker applications.
3. Setting up CAPITAL GROUPS – CAPITAL GROUPS are intended to be used to differentiate different kinds of equipment and assets. For example, you may want a Capital Group entitled “HVAC” so that all of your HVAC related items are listed together.
To setup CAPITAL GROUPS, expand LIFE CYCLE in the left sidebar and click on CAPITAL GROUPS (see attached below). Then Click on the green button – ADD NEW CAPITAL GROUP (shown below), complete the form and click SAVE.
If you have already setup CUSTOM FIELDS, you can assign them as you set up the CAPITAL GROUPS…or…you can go back and add CUSTOM FIELDS and assign them to the appropriate CAPITAL GROUPS.
4. Adding ITEMS – An ITEM can be any asset, piece of equipment or building component that you want to track the Life Cycle and/or Depreciation Schedule of. It does not have to be just building related. It can include IT equipment, maintenance equipment, flooring, actual real estate, as well as, building components like HVAC systems and roofs.
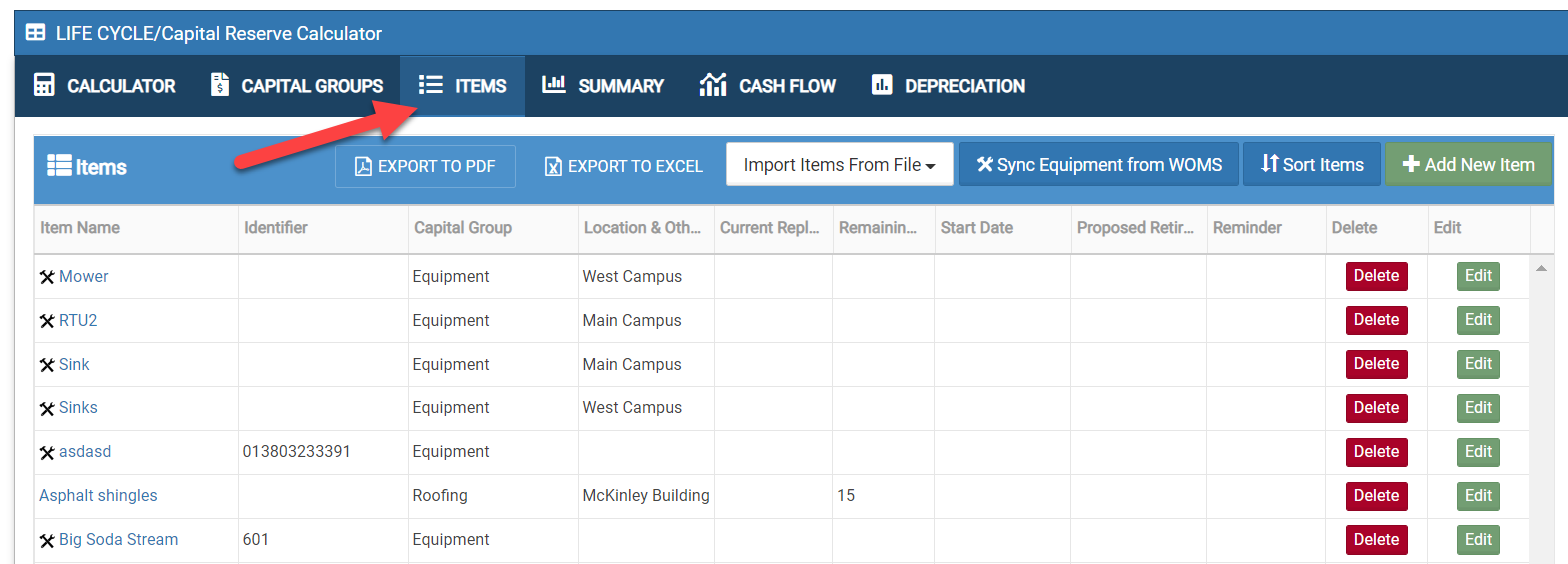
To create an ITEM, expand LIFE CYCLE in the left sidebar and click ITEMS.
There are 3 ways in which to add ITEMS:
- If you are a subscriber to Facility Tracker Work Order Management, you can click the blue button, SYNC EQUIPMENT FROM WOMS (see attached below). This will pull over all of the equipment you already have in Work Order Management so that you do not have to re-enter the data. BOOM!
NOTE: If you use this method, you will need to open each item to set the Life Cycle and Depreciation Data and Parameters.
NOTE 2: You can perform this sync with Work Order Management as often as you like to keep data in the system fresh and up to date.
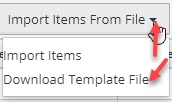
- If you have your data in an EXCEL spreadsheet, you can upload that data. Click IMPORT ITEM FROM FILE (see attachment below) and click DOWNLOAD TEMPLATE FILE. Transfer your data to this format, then click on IMPORT ITEMS and follow the prompts.
- You can add single items by clicking the green button ADD NEW ITEM (this button is also available on the “CALCULATOR” page). This can be done at any time, even if you used one of the above methods or starting from scratch. To use this method, follow these steps to complete the form (shown below):
- Provide Name – Make it as specific as needed to assist you in identifying this item and reporting on it accordingly.
- Add to Work Order Management – if you are a Facility Tracker Work Order Management subscriber, you can add new EQUIPMENT to your account by checking the box. This will allow you to include ITEMS to the Life Cycle Calculator AND Work Order Management from this setup screen.
- Capital Group – Select from the drop-down menu that was established above. If you need to add a new Capital Group…no worries…just go back and add what is needed.
NOTE: If you select a Capital Group that has a Custom Field assigned, that field will populate on this page for you to complete.
- Location & Other Notes – This field allows you to add a location or other specific notes related to this item.
- Current Replacement Value – What would it cost to replace the item today….not necessarily when it was purchased?
- Start Date – This is a critical date to get correct to allow the calculator to be most accurate. Here are the things to consider:
- If the Item is brand new…or new to you, then this date should be the date acquired.
- If this is an Item already in service, then you have 2 options which will have direct impact on the Remaining Useful Life (RUL). You can either list the date it was put into service. If so, then the RUL would need to be the original life expectancy. The other approach (BEST PRACTICE) is to set the Start Date as current and only project the RUL as future life expectancy. This will provide you with a more accurate picture of the funds needed in the future to address the replacement of the item.
Remaining Useful Life – How many more years will this item be in use or be functional…what is its Life Expectancy from today. See Start Date for more clarification.
- Is Depreciable – Is this item one that you want to track the depreciation. If so, click the box. This will expose 3 more fields:
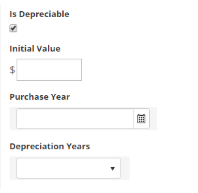
- Initial Value – What did this item originally cost or what was its original basis for depreciation?
- Purchase Year – What year was it purchased or what year did the depreciation begin?
- Depreciation Years – This is the number of years you will track the depreciation of the item.
NOTE: The Depreciation Years may be different from the Remaining Useful Life.
GENERAL NOTE: The Depreciation Grid will only depict a straight-line depreciation schedule. It does not account for accelerated depreciation.
- Custom Fields – If you have any Custom Fields associated with the Capital Group from this Item, they will be displayed next.
- Reminder – You can set a date and Reminder Text for every item and receive an email notification. This is great if you want to be reminded a year prior to the end of life for any item or other such reminders.Email reminder:
Email reminder:
- Comments – You and your team can add comments related to each Item.
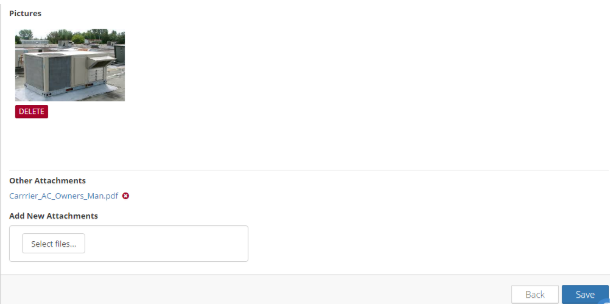
- Attachments – add as many attachments as you deem appropriate. These can be images, owner’s manuals, warranty documents, proposals for replacement, etc.
NOTE: If you are a Facility Tracker Work Order Management subscriber and you have Attachments and Comments associated with your equipment and data will transfer when you perform a Sync.
- SAVE – Don’t forget to click SAVE in the bottom right corner!
5. Set Inflation Factor – From the CALCULATOR page, you can set your custom Inflation Factor. Click on the drop down arrow and select the appropriate percentage rate then click the green button SAVE & CALCULATE.
6. END RESULT – Now that all the data has been added, what data do you get?
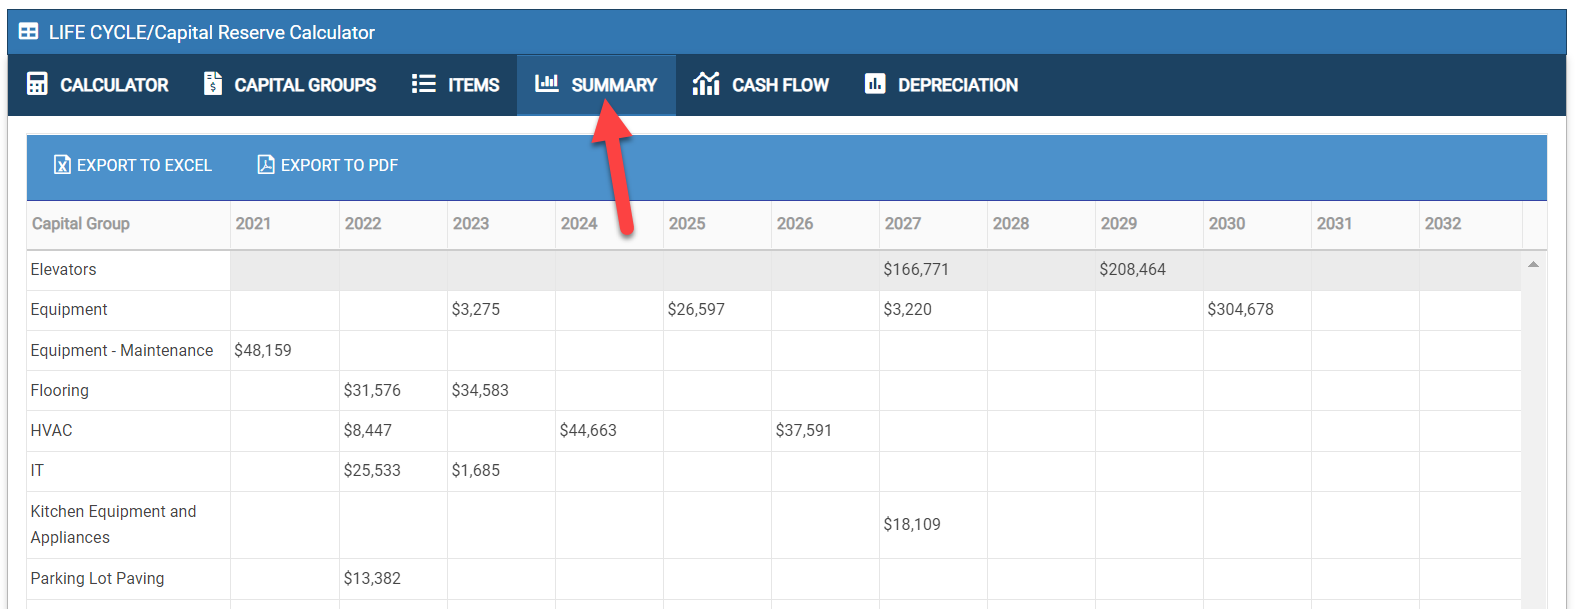
- SUMMARY – This page will show you the amount of monies that need to be retained for capital replacement purposes based on the year and Capital group.
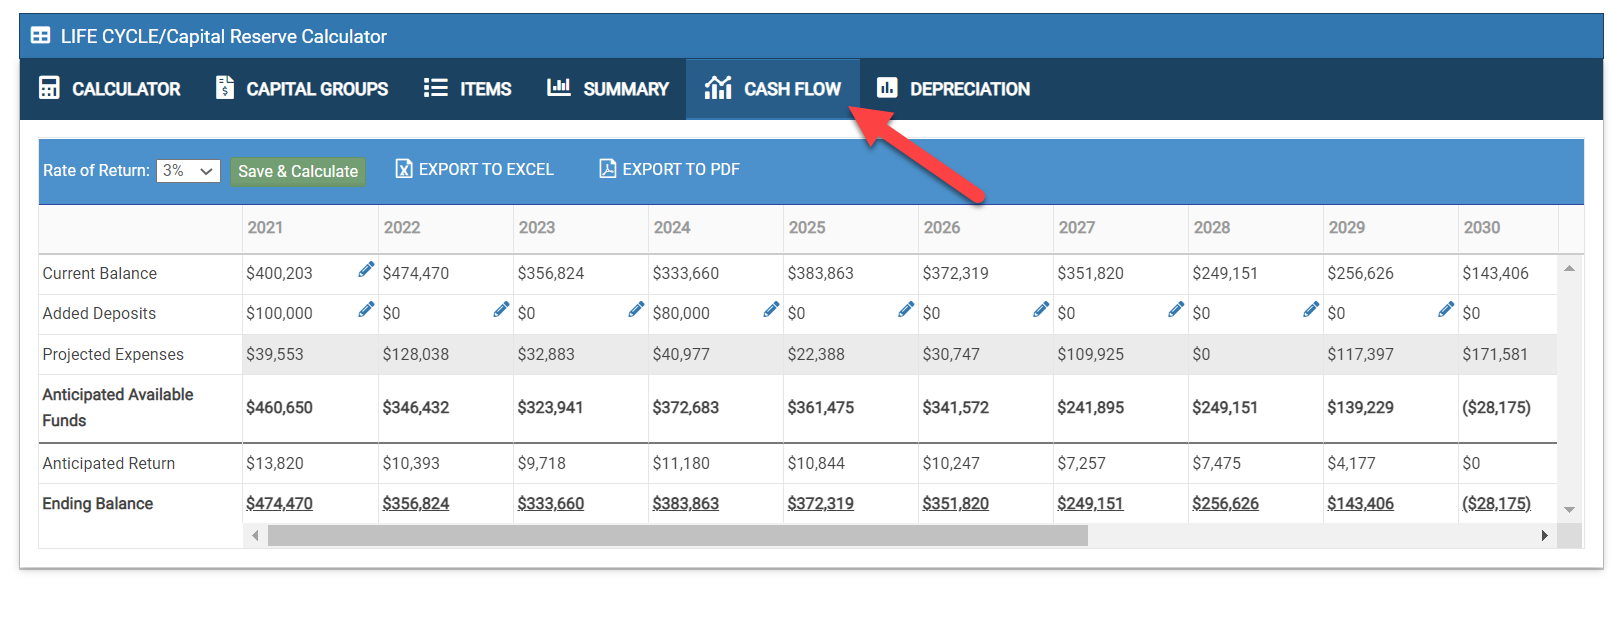
- CASH FLOW - This page allows you to adjust the rate of return, current balance and Added Deposits helping you to know just how much you can reinvest elsewhere
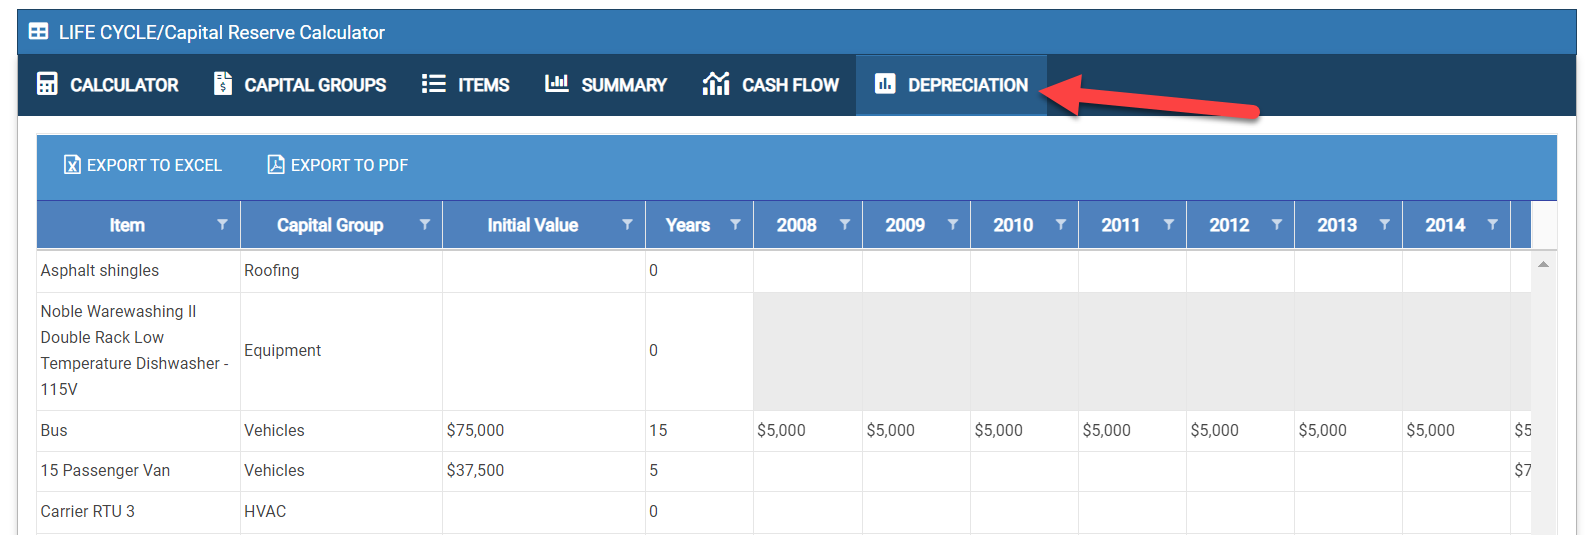
- DEPRECIATION – This page will list all Items that you indicated were depreciable and breaks down the depreciation amount by year.
- ITEMS – This Page shows all Items you have added. The grid columns are able to be filtered (see attachment below).
7. Export to Excel or PDF – Several of the grids have a button that allows you to export your data to an Excel file or PDF (see attachment above).
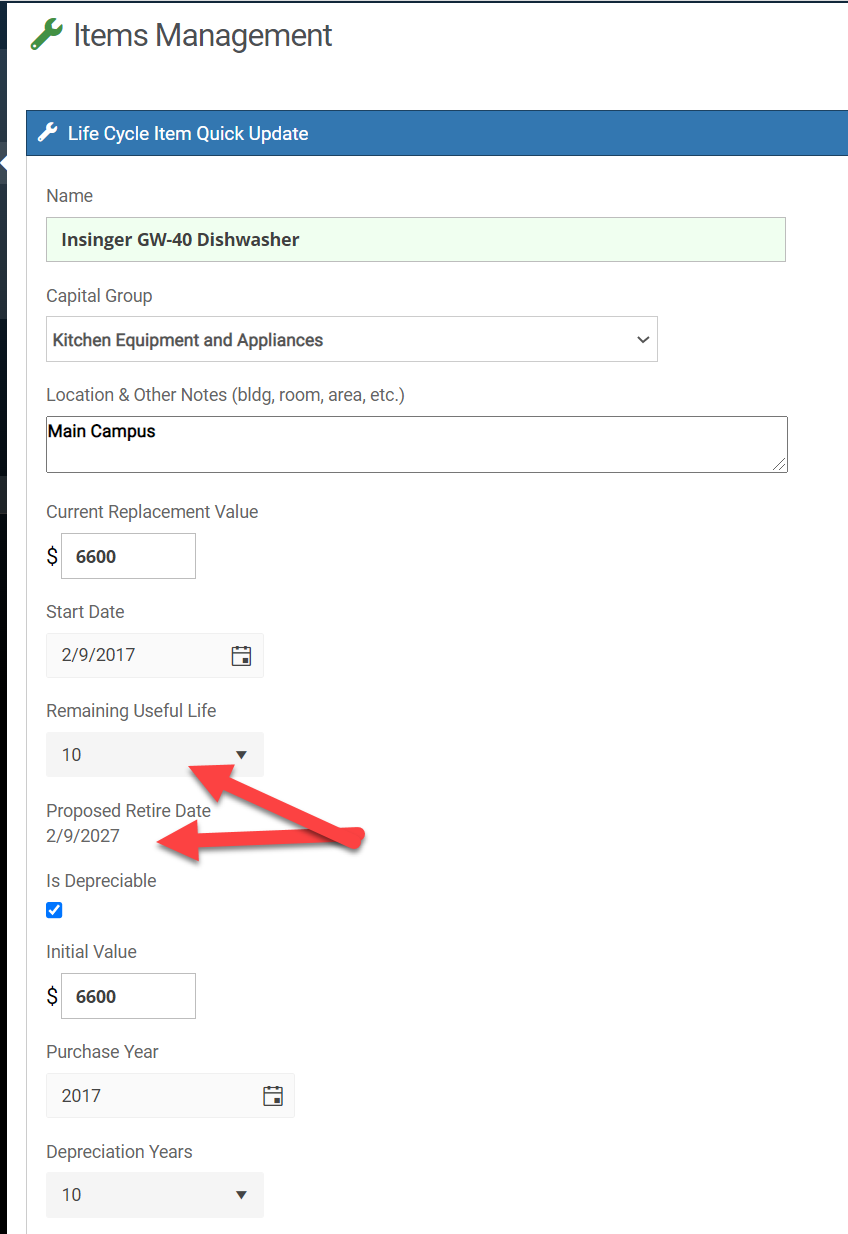
8. Retiring Item - When you click on a specific item on the "Items" tab, you will see all of the item life cycle details, including the "Proposed Retired Date". The system automatically calculates a “PROPOSED RETIRE DATE” for each item based on the Start Date and the RUL. If you desire to extend or shorten the PROPOSED RETIRE DATE, merely change the RUL forward or backward.
- You will receive an email notification 90 days prior to the PROPOSED RETIRE DATE.
- You can then retire the item by clicking on the tan RETIRE item button, located on the top of the page and the following form will pop up.

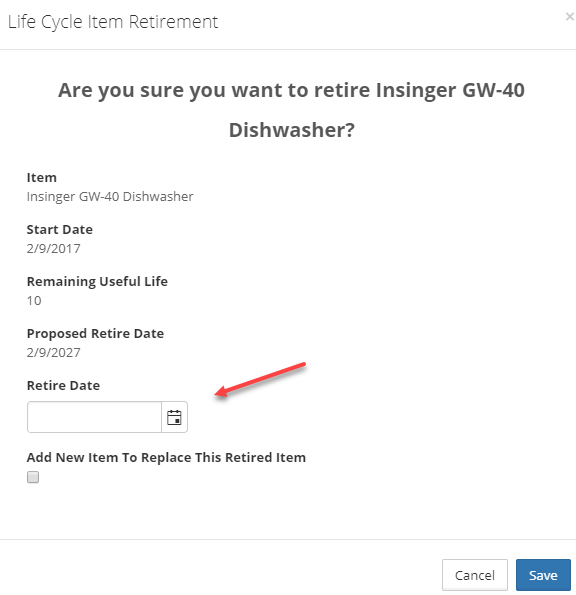
- Enter the date you are retiring the item
- If you desire to add a replacement item, then check the appropriate box
- Click SAVE
- After Clicking SAVE, the new screen will be the replacement ITEM.
- Some of the fields will be pre-populated, but are still editable
- Complete the balance of the form based on the new life cycle of the ITEM
- Click SAVE
NOTE: To show/view all retired items, click on "Show Retired Items" on the bottom right of the dashboard.
9. Cost Grid - Every Item has a COST GRID associated with it. This will allow you to add and track costs associated with each ITEM. This is not only a good repository of date, but will allow you to determine if the cost of maintenance has reached a point that replacement is your better option.
- Click on the item name, then scroll down to the middle of the of the "Items Management" page, and click on the green "Add New Cost" button.

This will open up a new box, where you can add your information (see attachment below).
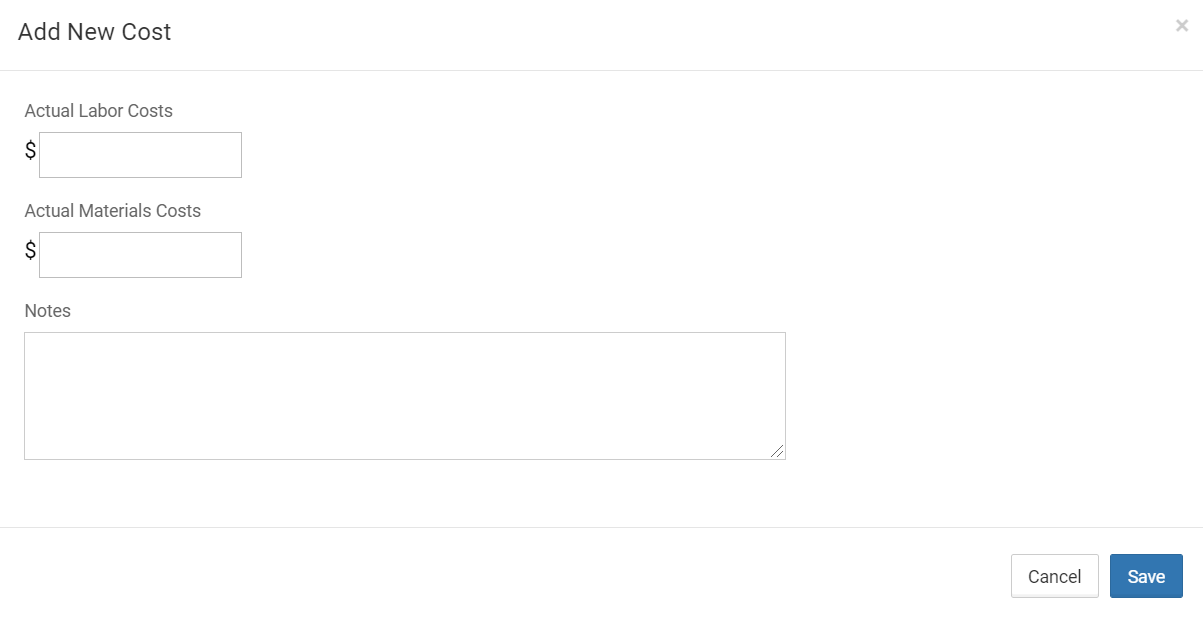
- Next, enter your labor and material costs, notes for reference, and choose SAVE (see below). NOTE: You also have the option to export your information to Excel.

- If you are also a Work Order Management subscriber, the costs entered in Work Order Management will be added into the cost grid and will be identified as costs from a Work Order. Note: If you want to edit/delete that cost it has to be done in Work Order Management, not in the Life Cycle Calculator.


Related Articles
Getting Started
Getting Started with Travel Tracker for End Users Video
If you are new to the Travel Tracker, this video will guide you through the basics.CCI Spreadsheets: Getting Started - where are my spreadsheets
Watch this short 2 minute video to learn how to quickly access your CCI Spreadsheets!Getting users off of the AS400 (for example, a backup)
This document is helpful for getting the users out of the AS400 for a backup/ accounts payable posting, etc. Click Attachments to view document.Getting School Nurses in the loop with field trips (Admins)
The Travel Tracker can automatically notify school nurses when students with health concerns are traveling. Nurses can have their own portal into Travel Tracker to view upcoming trips. This video tip shows Travel Tracker Administrators how to setup ...